Saturday 25 May 2013

Getting Ready for Summer (Aladdin pants)


I rarely sew for myself. It's one of those mechanic's-car-never-runs, plumber-has-leaky-faucets type of things. When I'm making something for myself (ergo, not getting paid or having someone depending on me) I have no sense of urgency. I tend not to finish the things I make for myself, leaving them unhemmed, closed with safety pins instead of a hook and eye (that's literally true. I made a skirt and wore it for years without putting a hook and eye on it). I also never make anything fussy or complicated for myself. I tend to make very simple, utilitarian things I don't need a pattern for, like circle skirts, tunic tops, and pyjama pants.

This is my latest simple-but-great project. These pants are insanely comfortable and really, quite simple. They are a style that is actually quite ancient, being essentially the first pants every designed. They originated in Persia, which is why Aladdin wears them. They cover more than a skirt while at the same time being very good hot-weather pants. Lots of airflow.

I'm not going to attempt to post a pattern for two reasons: 1) I don't have one and 2) you don't need one. You can easily draw everything on the fabric.

You will need a square of whatever fabric you want. Light cottons, rayons and silks (if you're feeling fancy) are the best. Polyester would work fine as well, the key here is lightness. You want the fabric to be very drapey and floaty. Depending on the width of your fabric, you will need different lengths. So if your fabric is 115cm wide, you need 115cm in length (though most fabric stores only cut on the 10s, so you'll likely need to get 120cm). Keep in mind that the wider the fabric is, the longer the pants. If you're a bigger person like me, you probably won't be able to get anything longer than shorts and you may run into trouble with the smaller-width fabrics.

Okay. Tutorial time:

Measurements needed: Your hips at their widest point; your waist where you want the pants to sit; and your calf at its widest point.

1) Fold the fabric in half diagonally, then in half again bisecting the right angle.

2) Math time! To find the length that you measure down to create the waistline, take your HIP measurement and Divide it by 1.6, then divide it in half. The equation is r= (HIP/1.6)/2.

So let's say your hips are 100cm. 100/1.6 = 62.5

Divided in half again, and we have 31.3cm

3) Pivoting on the top corner, measure down your r from one side of the angle to the other. Cut along the line you've just drawn


4) At the other corner, find a place where the distance between the two sides is equal to half your calf measurement. I like to put a curve in this, but you don't have to. A straight line works fine as well. Cut along this line.


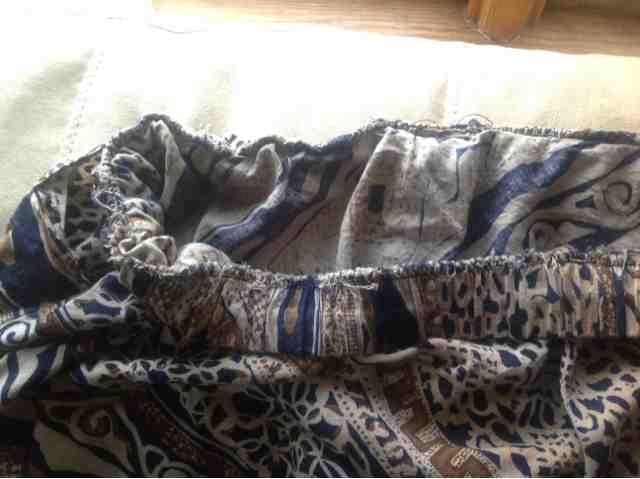
5) With right sides together, sew your side seams from the waist opening to the leg opening, using 1/4" seam allowance.

6) Cut 3 strips of fabric 2 times the width of your elastic + 1" wide (if your elastic is 1", cut the strip at 3"). You need one the length of your hip measurement + 1" and two the length of your calf measurement +1". Sew the ends of each together to make a circle.

7)  Cut 1 piece of elastic 1" shorter than your waist measurement and 2 pieces of elastic 1" shorter than your calf measurement. Sew the ends of each together to make a circle.

8) Fold the fabric circles in half over the elastic circles, pin at the quarters. (The fabric circles will be bigger than the elastic circles.) Sew the fabric together, encasing the elastic. Stretch the elastic as you go. These are now your waistband and leg bands!

9) Attach the waistband and leg bands to the pants, stretching the elastic in the casing.


And you're done!


I hope this makes sense! If you try these, please leave a comment and let me know what needs clarification.

Thursday 16 May 2013

A Living Flame (Pictures)

I was recently asked to make a custom dance costume for a local dancer. I've known this girl since she was about 10, and she is a seriously accomplished dancer, so I was rather chuffed to be able to do it. I also really enjoy making stretch wear. It was one of my favourite classes at University and it's something that I don't get a lot of opportunity to do. I had hoped that when I did the costumes for The Little Mermaid last fall (that post will happen someday) that I would be able to draft the bodysuits, but there ended up being about 30 of them needed, so it just didn't happen.

Brenna had a very interesting concept for her solo this year: a flame. Unfortunately, she couldn't find anything in the dance wear catalogues that looked the way she wanted, so she asked me to design and make her something. This is how it turned out.


The dance was very cool, too. She did extremely well in competition, and one of the adjudicators even wrote on her sheet "Fantastic Costume!" I'm really proud.

Tuesday 14 May 2013

Tea Time! (English muffins)

I found this recipe in one of my favourite cookbooks, a British book called Baking: a Common Sense Guide. There's a whole series of them, we have Cooking and 30-Minute Meals. They are great cookbooks, with lots of interesting recipes. The only downside has been that they do a lot of measuring by weight. However, I recently got a very nice kitchen scale so that's not a problem any more! Woo!


So. I figured, English cookbook-English muffin recipe. Must be a good one! And they weren't bad.


However, they weren't what I think of as English muffins. I would say they were excellent flat white buns. They did end up crisp, which was nice, but they were lacking in the bubbly, full-of-holes-to-catch-the-butter-ness that I associate with English muffins. Granted, I've never had anything but store-bought before, so I don't know what "real" ones are supposed to be like, but I was a bit disappointed with these.

Willow was fascinated by the mixer. So am I, usually
I did some more reading and discovered that many people cook these on a griddle. Maybe I'll try that next time. 


On the plus side, they were the perfect size to make tiny sandwiches for the kids, so despite my disappointment they got eaten up pretty quick!

Note: I took all the pictures for this one with my phone, sorry about the terrible quality...

ENGLISH MUFFINS


Preparation time 20 minutes +
Total cooking time 15 minutes
Makes 15

Ingredients:
 2 teaspoons dried yeast
1/2 teaspoon sugar
530 g (1 lb 3 oz/41/4 cups) plain (all-purpose) flour
350 ml (12 fl oz) lukewarm milk
1 egg - lightly beaten
40 g (11/2 oz) butter - melted

1. Lightly dust two 28 x 32 cm baking trays with flour.
2. Put the yeast, sugar, 1 teaspoon of the flour and 60ml (2 fl oz/1/4 cup) warm water in a small bowl and mix well. Leave in a warm draught-free place for about 10 minutes, or until bubbles appear on the
surface. The mixture should be frothy. If your yeast doesn't foam, it is dead.
3. Sift the remaining flour and 1 teaspoon salt into a large bowl. Make a well in the centre and add the milk, egg, butter and yeast mixture all at once. Using a flat-bladed knife, mix to a soft dough. (I used my mixer with a dough hook. Maybe that's why they weren't bubbly, perhaps?)
4. Turn the dough onto a lightly floured surface and knead lightly for 2 minutes, or until smooth. Shape the dough into a ball and place in a large, lightly oiled bowl. Cover with plastic wrap or a damp tea
towel (dish towel) and leave in a warm place for 11/2 hours, or until well risen.
5. Preheat the oven to 210°C (415°F/Gas 6-7). Punch the dough down and knead again for 2 minutes, or until smooth. Roll to 1 cm (1/2 in) thick, then cut into rounds with a lightly floured plain 8 cm
(3 1/4 in) cutter and place on the trays. Cover with plastic wrap or a damp tea towel and leave in a warm, draught-free place for 10 minutes.
6. Bake for 15 minutes, turning once halfway through cooking. Transfer to a wire rack to cool. Serve warm or cold.

Source- Baking: A Common Sense Guide

Saturday 11 May 2013

My Mother's Hands

I have my mother's hands. I have all my life. Those five words have defined the part of my body I see the most, use the most, for as long as I can remember. They are not what are typically thought of as beautiful hands. They are not "elegant", nor do they have "long, slim fingers tipped with pale ovals of fingernail." I read that phrase once and it always stuck with me. For some reason I always imagine those hands playing piano effortlessly.

No, my hands are large. They are square. The fingers, though long enough, are not slim. The nails are round and flat and look terrible when I have tried to grow them long. I keep them short, rarely extending beyond the tips of my fingers. I do love to paint them, though, and I try to keep them nice. Just like my mother's.


My mother's hands are immensely strong, or at least they have always seemed so to me. We used to hold hands sometimes in the car and I would inevitably start the "interlocking fingers and squeezing" game of chicken. I always, always lost. I tried it again not too many years ago and learned, much to my chagrin and despite the fact that I am a good 6" taller than Mum and outweigh her by more that I like to think about, she is still significantly stronger than me.

My mother's hands are the hands I try to emulate when I make bread. It doesn't matter the videos I watch or the articles I read about kneading, I always end up moving the dough the way I remember her moving it. My mother's bread is amazing, and always has been. I think this is partly why I get such warm fuzzies when my house smells like bread.


My mother's hands made all my dance costumes, most Hallowe'en costumes, skating costumes and a good many pieces of clothing. She gets frustrated when she sews, but she certainly can do it. She is creative, though sometimes (rather like me) she doesn't see that.

My mother's hands cook. They cook effortlessly (or so it appears), they cook inventively and they cook amazingly. A lot of people will, when they make a recipe they had as a child, say to others "But it's not as good as my mom's." Believe me when I say I have a significantly higher peak to scale to reach that pinnacle than others. My parents instilled in me a love of - and interest in - good food that I share with my husband and hope to pass on to my children. I dream of one day making my mother's spaghetti carbonara and having it be "right." Someday. I hope.


I am proud of my hands. They may never feature in a magazine; they may never effortlessly play the piano; they may chap, and have hangnails and the nails may get dry and crack when I'm sewing a lot, but they are mine. They hold my children. They put the ring on my husband's hand. They make bread I am proud of. They sew, draw, dye, sand: they make the things I imagine come to reality. They were there to catch my daughter when she started walking. They clap when my son stands on the couch with his ukelele and serenades me. They are supportive, and gentle and strong. Just like my Mother's.

the day my son was born
Happy Mother's Day, Mum. I love you.


Monday 6 May 2013

Home freshener! (Bread)

I love making bread. I absolutely love it. I love baking in general, but bread is possibly my favourite. I love the smell of the yeast; I love the texture of the dough; I love kneading (although one of my recipes cuts that out entirely); I love the way it makes my whole house smell amazing. That smell in particular is so fantastic. Even if its high summer, it makes me feel all cozy... Actually, although I'm overjoyed at the fact that summer appears to be coming back after all, I will miss being able to bake with impunity. I have a second stove in the basement that I use in the summer, but that's going to be sad this year as I now have my amazing new stove...

I used to have a bread maker; Ryan bought it for me years ago. It was great, and I used it a lot. In fact, I used it up! One day, while I was making a batch of bread, I noticed that it sounded... Odd. At the end of the cycle I went to get my lovely bread and instead found a burnt mass of unmixed ingredients. It turned out that the stirring paddle/mechanism had rusted into a solid lump. Not a good thing, I must say. So I started doing it by hand. Well, I cheat. I do use my mixer with a dough hook. But I still consider that by hand.


I have found a few recipes that I really like, but I'm always looking for new ones. The one I used today makes, I'd say, the best plain bread around. It is such good toast. mmm...toast... I've also found that bulk barn carries really nice flour. I just love it. And since I bake so much I appreciate being able to buy in bulk. The staff here sometimes give me funny looks, but I think some of them are starting to recognize me.

Regardless, I'm not posting a tutorial today, instead I'm going to post a video I made a while back of me making this bread. The only difference today is that i used 2 cups whole wheat flour in place of some of the white. The original recipe is here


Saturday 4 May 2013

Willow's First Birthday part 2 (Tiny, Tiny Shoes)

The other great thing about Willow being so small and unaware of things is that I can make her birthday present as she plays by my cutting table. She has been outgrowing shoes at an alarming pace, but as none of her shoes stay on her bloody feet for more than half an hour it doesn't really seem to matter. However, now that she's really walking (and no that it's FINALLY started getting nice out) she really needed a pair of shoes that she could walk in and that were not so easy to remove.
Birthday shoes! I was in a rush to take this as she went outside in them immediately after....

I've been making baby shoes since last fall and I love it. They're so much fun to make! Although I've put some of the shoes I've made on her, this was the first pair I'd made just for Willow. I'm really happy with them, although I'm going to have to make another pair pretty soon! My little weed...

To see more of my baby shoes, check out Banana Who? (my facebook page)


These were a custom order. I'm really happy with them.


Friday 3 May 2013

Willow's first birthday (Boston cream pie)

Today is Willow's first birthday. Its amazing to think that my little bird has been in my life for a year already. A friend once said "you never notice how time flies until you start measuring it against your children."

One of the best things about the kids being so little is that they really get no say in what kind of birthday cake I make them. In a few years, sure, I'll let them decide, but for now it's all me, baby!

After doing some thinking and looking around in Gojee (love that app!) and allrecipes, I decided to attempt a Boston Cream Pie. Which, interestingly, is not a pie at all. It is a custard-filled layer cake with chocolate ganache on top. I couldn't find a single recipe I liked, so I used three separate recipes: vanilla custard, white cake and ganache.


The custard turned out perfectly! I love custard, so I'm pretty excited to have found this recipe. I want to try different flavours now....


The cake, though delicious, was not the best choice for a Boston Cream Pie. I think instead of a white cake I should have looked for a sponge cake. It was too dense and when we cut it all the custard squished out. I will definitely use it for cupcakes, though.


I ran out of white sugar and used brown to make up the difference, which leant the cake a nice caramel-ey flavour and a lovely light brown colour. I also ran out of butter and didn't feel like going downstairs to get more (Willow was in a clingy mood and I didn't want to deal with the screaming....) so I ended up using about 2/3 butter and 1/3 applesauce. An interesting thing my-sister-the-chef taught me is that although you can sub out applesauce for fat in most baking recipes, you should always retain at least 1-2 tablespoons of the fat to keep the crumb.


The ganache.... Was disappointing. I tried a different recipe and - although it tasted lovely - I doubt I'll use it again.

Recipes:

Vanilla custard (adapted from allrecipes.com)
Ingredients

1/2 cup nonfat dry milk powder
2 tablespoons cornstarch
3/4 cup white sugar
1 1/2 cups water
4 egg yolks, beaten
1 teaspoon vanilla extract

Mix nonfat dry milk, cornstarch, and sugar together in a medium sized saucepan. Stir in a mixture of water and egg yolks gradually, until smooth. Cook and stir over medium heat until thick and smooth. Continue to cook while stirring over low heat for one minute longer. Remove from heat and stir in almond extract. Allow custard to cool before using.

White cake (also adapted from allrecipes.com)
Ingredients

2 cups white sugar
1 cup butter
4 eggs
1 tablespoon and 1 teaspoon vanilla extract
3 cups all-purpose flour
1 tablespoon and 1/2 teaspoon baking powder
1 cup milk

Preheat oven to 350 degrees F (175 degrees C). Grease and flour 2 9" cake pans.
In a medium bowl, cream together the sugar and butter. Beat in the eggs, one at a time, then stir in the vanilla. Combine flour and baking powder, add to the creamed mixture and mix well. Finally stir in the milk until batter is smooth. Pour or spoon batter into the prepared pan.
Bake for 30 to 40 minutes in the preheated oven. For cupcakes, bake 20 to 25 minutes. Cake is done when it springs back to the touch.

Chocolate ganache

Ingredients
8 oz. semichocolate chips
¾ cups evaporated milk or heavy cream
2 tbsp. butter
1 tbsp. brandy (optional)

1. Melt chopped chocolate chips in evaporated milk.
2. Add butter and brandy (if using) and mix until smooth and shiny.
3. Cool slightly then dip biscotti or pour over cake or tart.